広告 消すべし 慈悲は無い - 広告ブロックDNSサーバ「Pi-hole」を使う
逸般の誤家庭によくある「買い過ぎて余った Raspberry Pi」「押入れにしまい込んだままのPC」「リソースが余っている仮想化環境」の有効活用法として、広告ブロックDNSサーバ「Pi-hole」を紹介。

広告ブロックの定番 AdBlock やプロキシ系の Proxydomo・Privoxy と比べた場合、導入・動作検証・安定運用までのハードルがやや高めな為、Web広告に対し心の底から
- ニンジャ 死すべし 慈悲はない
- 見敵必殺(サーチアンドデストロイ)
- 駆逐してやる!! この世から… 一匹… 残らず!!
- 俺は世界を救わない。ゴブリンを殺すだけだ
- しばきに行きませんか? しばいたほうがいいと思いませんか? だからしばき倒しに行きましょう
な心境になった事がある人にお勧め。
About Pi-hole
Pi-hole とは?
ソフトウェアやブラウザの拡張機能を入れことなく、クライアントの DNS 設定を変更するだけで Web 広告やトラッキングを防ぐ事が可能な、DNS ベースの広告ブロック DNS サーバです。
メリット
- 広告スクリプト遮断により読み込み・表示速度の向上、転送量の低下。
- Pi-hole の設定は Web インターフェイス(管理画面)から。
- クライアント側の設定はDNSの変更のみ。
- 個人 or 30名程度の小規模利用ならば、CPU負荷はそれほど高くない。
- ネットワーク上すべての通信が対象な為、PCだけでなくAndoroid,iPhone,ネットワーク家電でも適応される。
- 別途ブロックリストを作成する事で、子ども向け簡易Webフィルタリングとして使用可能。
- ISPでDNSサーバの接続障害が発生しても問題無し?
デメリット
- 24時間365日稼働が前提な為、静音・低消費電力環境は必須。
- ドメインへの初回アクセス or DNSキャッシュの有効期限切れの場合、100~1000ms 程遅延が生じる。
- ブロッキングはドメイン単位な為、「特定URLのみをブロッキング」という事はできない。
- ブロッキングが誤爆する場合も。その場合、該当ドメインをホワイトリストに追加で対応。
- 上記対応でブラウザのデベロッパーツールを使用し、該当ドメインを特定する為の知識と経験が必要。
- 広告ブロッキング有効時、一部サイトで先に進めない or 閲覧不可な場合も。
- DNS ブロッキングの有効/無効の切り替えは Web インターフェイス(管理画面)経由で。
- Chrome & Firefox 用にブロッキングの有効/無効の切り替え可能な ブラウザ拡張機能 が。
前準備
実行環境
24時間365日稼働が前提な為、実行環境を仮想化環境(Hyper-V, VMware ESXi, Proxmox VE 等)で用意する場合を除き、静音&低消費電力な Rapberry Pi もしくは Mini-ITX CPUオンボード 辺りがお勧め。本番運用前の動作検証は VirtualBox で試すのもありかと。中の人は「VirtualBox 上に Raspbian をインストールし、バックグランドで起動させる」と力業な事をしていました。
広告ブロック検証用のWeb広告多めのサイトリスト
具体的なURLやサイト名を出すとアレがナニでトラブルの元なので、「アフィリエイト ブログ 収入 OR 収益で検索すると広告多めなサイトが多数見つかる」とだけ言っておきます。
DNS切り替え可能なツール
- DNS Jumper - k本的に無料ソフト・フリーソフト
- リストから選ぶだけ。お手軽なDNS設定の変更ツール「Public DNS Server Tool」 - 窓の杜
- IP(v4)アドレスを切り替えるバッチファイルです - palm84.com
インストール
Pi-hole インストール前に
- OS
- 最新のアップデート適応
- root のパスワードをデフォルトから変更
- IPアドレス(IPv4/IPv6)の割り当てを固定に
- DNS
- 現在使用している ISP の DNS サーバアドレス(IPv4/IPv6)をメモ
が済んでいる事を確認の上、次の手順に進んでください。
動作環境
Pi-hole を動かす為の動作環境は
Hardware
Pi-hole is very lightweight and does not require much processing power
- Min. 2GB free space, 4GB recommended
- 512MB RAM
Despite the name, you are not limited to running Pi-hole on a Raspberry Pi. Any hardware that runs one of the supported operating systems will do!
Software
Pi-hole is supported on distributions utilizing systemd or sysvinit!
Supported Operating Systems
The following operating systems are officially supported:
Distribution Release Architecture Raspberry Pi OS (formerly Raspbian) Stretch / Buster ARM Ubuntu 16.x / 18.x / 20.x ARM / x86_64 Debian 9 / 10 ARM / x86_64 / i386 Fedora 30 / 31 ARM / x86_64 CentOS 7 / 8 x86_64
Prerequisites - Pi-hole documentation
と低めですがストレス無く運用する事を考えると、OS は最新のメジャーバージョン、Raspberry Pi ならスペックに余裕のある Raspberry Pi 3 以降、仮想化環境(VMware ESXi, Hyper-V, Proxmox VE 等)で動かすのなら
- CPU : 2 Core
- RAM : 1~2GByte
- HDD : 16Gbyte
と余裕持った動作環境を。
インストール
以下の環境でインストールをしています。他のOSでインストールする場合は参考程度にしてください。
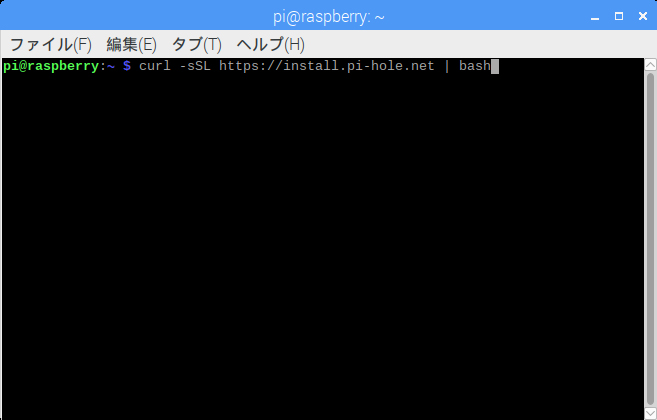
Pi-hole のインストールは以下のコマンドで。セキュリティ的にネット経由でインストーラを実行するのは不安な場合、2 or 3番目の方法を。
ネット経由で自動インストール。
curl -sSL https://install.pi-hole.net | bash
GitHub からリポジトリをクローンしてインストール。
git clone --depth 1 https://github.com/pi-hole/pi-hole.git Pi-hole
cd "Pi-hole/automated install/"
sudo bash basic-install.sh
インストーラをダウンロードして実行。
wget -O basic-install.sh https://install.pi-hole.net
sudo bash basic-install.sh
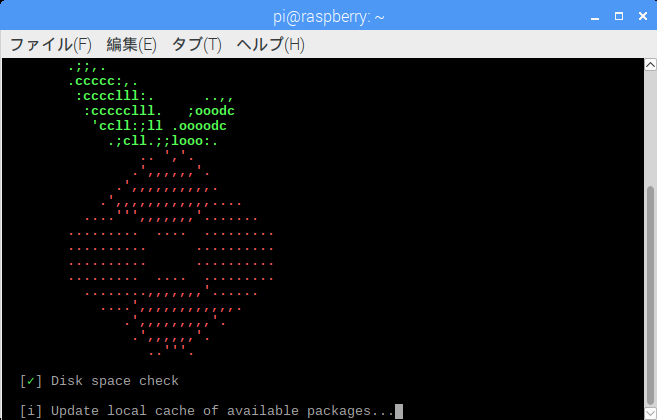
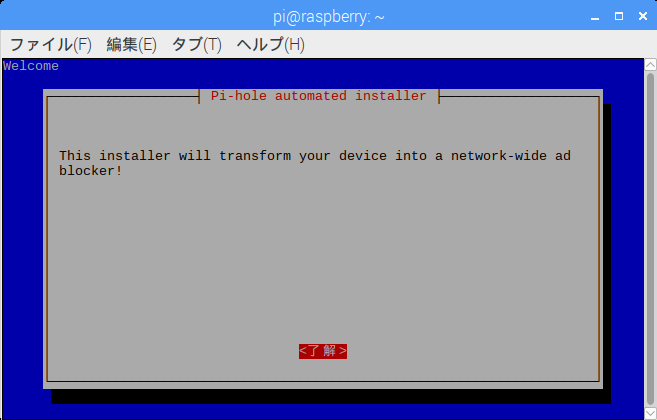
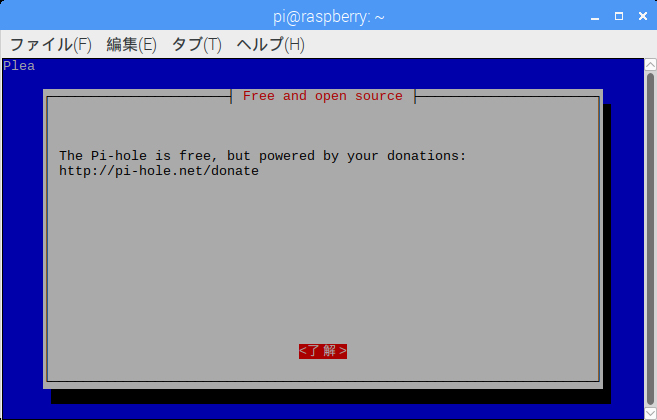
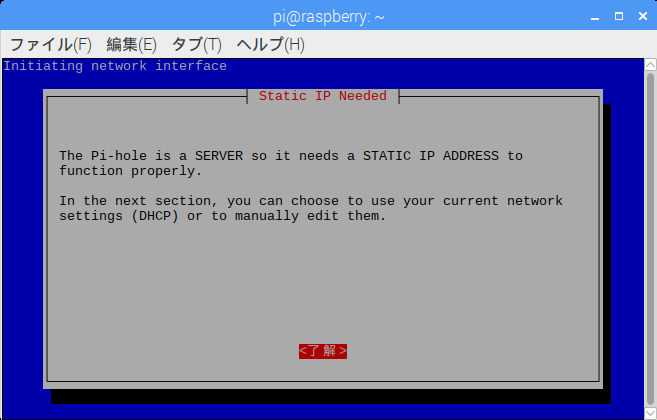
基本デフォルトの設定のままで問題無く、インストール中に注意する事と言えば「管理画面へのログインパスワードをメモする」事ぐらい。設定変更時のファーカス位置は矢印キーで上下移動、タブで了解・取消へ移動。
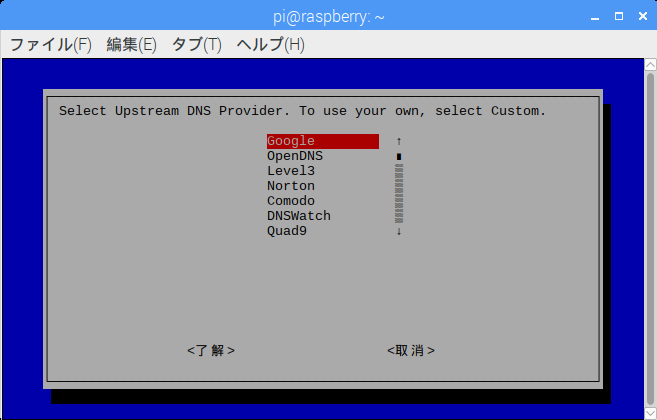
Pi-hole からの DNS 問い合わせ先を指定。後から変更可能、とりあえず Google を選択推奨。
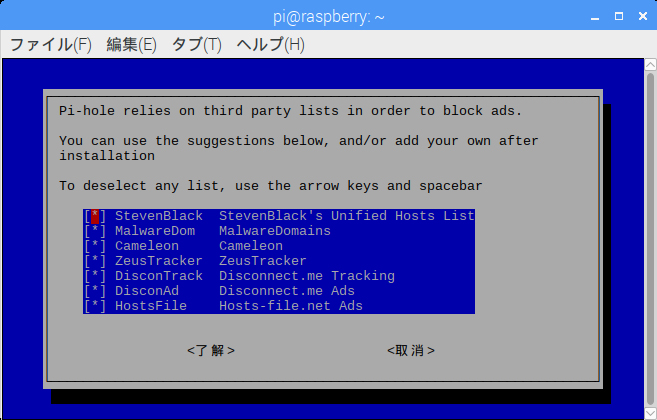
広告ブロックリストの有効・無効を指定。リストは後から追加可能。
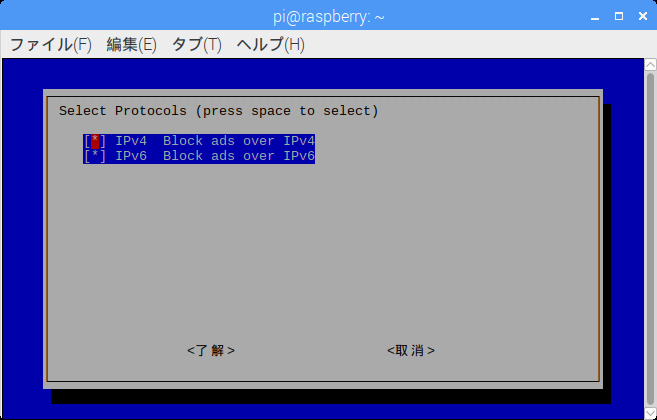
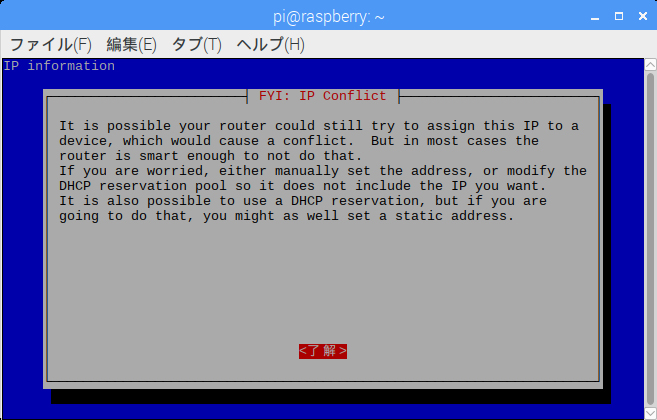
広告ブロックするIPプロトコルを選択。特に理由がないのであれば IPv4/Ipv6 両方を有効に。
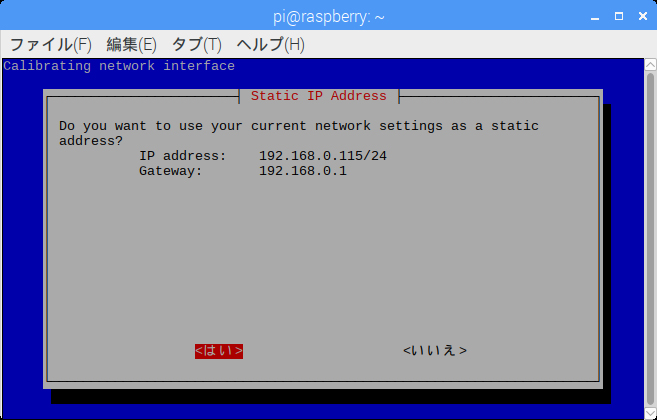
IPv4 or IPv6 どちらかをルータから DHCP で動的に取得している場合にでる?(要検証@2018/11/17)
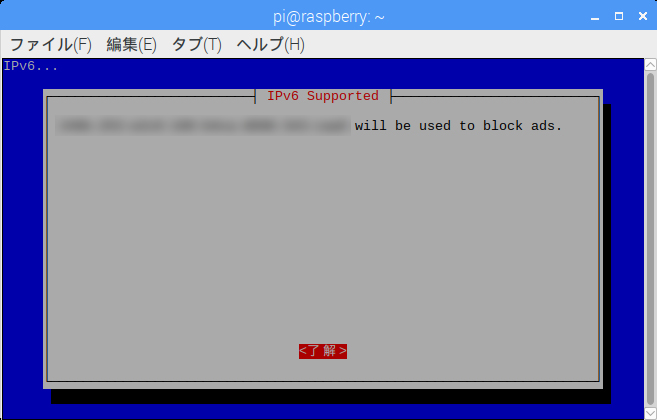
IPv6 での DNS サーバのIPアドレス。
Web インターフェイス(管理画面)を使用しますか?
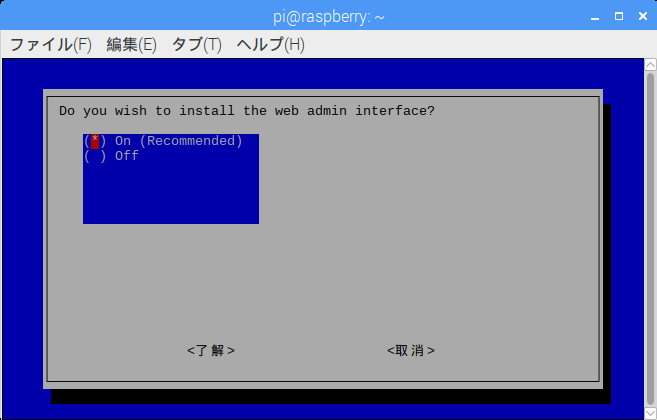
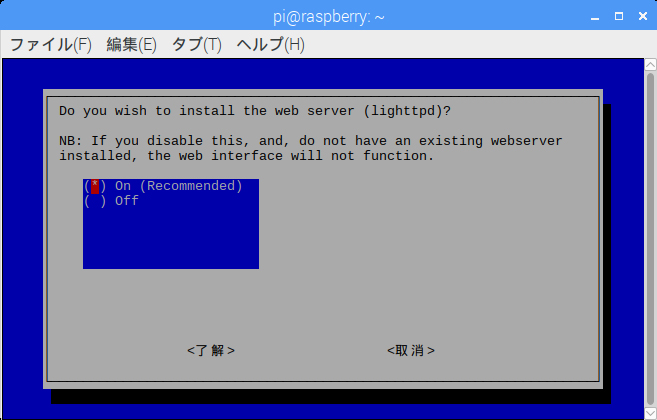
Web インターフェイス(管理画面)用に lighttpd をインストールしますか?
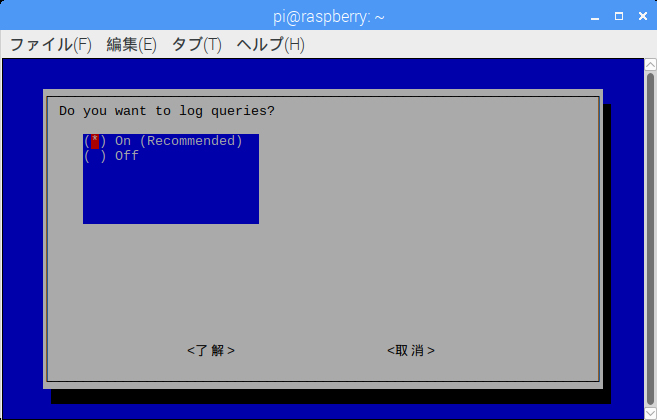
DNS クエリをログとして保存しますか?
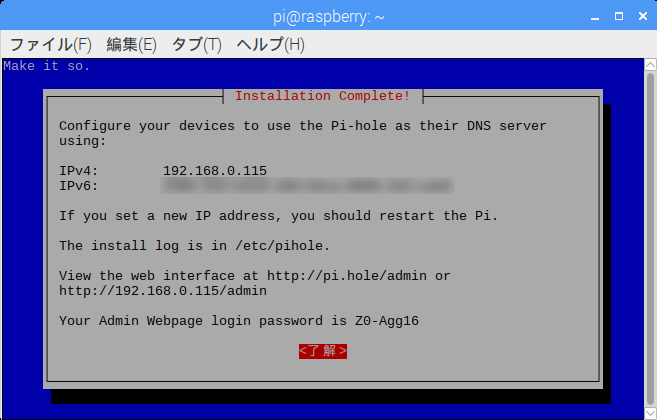
インストールはこれで終了。Pi-hole の
- DNS サーバのアドレス(IPv4/IPv6)
- Web インターフェイス(管理画面)のアドレス & ログインパスワード
が表示される。ログインパスワードは必ずメモをしておく事。
pi@raspberry:~ $ curl -sSL https://install.pi-hole.net | bash

  [✗] Root user check
  [i] Script called with non-root privileges
  [i] The Pi-hole requires elevated privileges to install and run
  [i] Please check the installer for any concerns regarding this requirement
  [i] Make sure to download this script from a trusted source

  [✓] Sudo utility check

  [✓] Root user check

        .;;,.
        .ccccc:,.
         :cccclll:.      ..,,
          :ccccclll.   ;ooodc
           'ccll:;ll .oooodc
             .;cll.;;looo:.
                 .. ','.
                .',,,,,,'.
              .',,,,,,,,,,.
            .',,,,,,,,,,,,....
          ....''',,,,,,,'.......
        .........  ....  .........
        ..........      ..........
        ..........      ..........
        .........  ....  .........
          ........,,,,,,,'......
            ....',,,,,,,,,,,,.
               .',,,,,,,,,'.
                .',,,,,,'.
                  ..'''.

  [✓] Disk space check

  [✓] Update local cache of available packages

  [✓] Checking apt-get for upgraded packages... up to date!

  [i] Installer Dependency checks...
  [✓] Checking for apt-utils
  [i] Checking for dialog (will be installed)
  [✓] Checking for debconf
  [✓] Checking for dhcpcd5
  [✓] Checking for git
  [✓] Checking for iproute2
  [✓] Checking for whiptail
  [i] Using Google DNS servers
  [✓] Set IP address to 192.168.0.115
            You may need to restart after the install is complete
  [i] Found IPv6 GUA address, using it for blocking IPv6 ads
  [i] IPv4 address: 192.168.0.115/24
  [i] IPv6 address: ****:****:****:****:****:****:****:****
  [i] Web Interface On
  [i] Web Server On
  [i] Logging On.
  [✗] Check for existing repository in /etc/.pihole
  [✓] Clone https://github.com/pi-hole/pi-hole.git into /etc/.pihole

  [✗] Check for existing repository in /var/www/html/admin
  [✓] Clone https://github.com/pi-hole/AdminLTE.git into /var/www/html/admin

  [i] Main Dependency checks...
  [i] Checking for bc (will be installed)
  [✓] Checking for cron
  [✓] Checking for curl
  [i] Checking for dnsutils (will be installed)
  [✓] Checking for iputils-ping
  [i] Checking for lsof (will be installed)
  [i] Checking for netcat (will be installed)
  [✓] Checking for psmisc
  [✓] Checking for sudo
  [✓] Checking for unzip
  [✓] Checking for wget
  [i] Checking for idn2 (will be installed)
  [i] Checking for sqlite3 (will be installed)
  [✓] Checking for libcap2-bin
  [i] Checking for dns-root-data (will be installed)
  [i] Checking for resolvconf (will be installed)
  [i] Checking for lighttpd (will be installed)
  [i] Checking for php-common (will be installed)
  [i] Checking for php-cgi (will be installed)
  [i] Checking for php-sqlite3 (will be installed)
  [✓] Enabling lighttpd service to start on reboot
  [✓] Installing scripts from /etc/.pihole

  [i] Installing configs from /etc/.pihole...
  [✓] No dnsmasq.conf found... restoring default dnsmasq.conf...
  [✓] Copying 01-pihole.conf to /etc/dnsmasq.d/01-pihole.conf

  [i] Installing blocking page...
  [✓] Creating directory for blocking page, and copying files
  [✓] Backing up index.lighttpd.html

  [✓] Installing sudoer file

  [✓] Installing latest Cron script

  [✓] Installing latest logrotate script

  [i] FTL Checks...
  [✓] Detected 32bit (i686) architecture
  [i] Checking for existing FTL binary...
  [✓] Downloading and Installing FTL


  [i] Skipping firewall configuration
  [✓] man pages installed and database updated
  [i] Systemd-resolved is not enabled
  [✓] Starting lighttpd service
  [✓] Enabling lighttpd service to start on reboot
  [i] Restarting services...
  [✓] Starting pihole-FTL service
  [✓] Enabling pihole-FTL service to start on reboot
  [✓] Deleting existing list cache
  [i] Neutrino emissions detected...
  [✓] Pulling blocklist source list into range

  [i] Target: raw.githubusercontent.com (hosts)
  [✓] Status: Retrieval successful

  [i] Target: mirror1.malwaredomains.com (justdomains)
  [✓] Status: Retrieval successful

  [i] Target: sysctl.org (hosts)
  [✓] Status: Retrieval successful

  [i] Target: zeustracker.abuse.ch (blocklist.php?download=domainblocklist)
  [✓] Status: Retrieval successful

  [i] Target: s3.amazonaws.com (simple_tracking.txt)
  [✓] Status: Retrieval successful

  [i] Target: s3.amazonaws.com (simple_ad.txt)
  [✓] Status: Retrieval successful

  [i] Target: hosts-file.net (ad_servers.txt)
  [✓] Status: Retrieval successful

  [✓] Consolidating blocklists
  [✓] Extracting domains from blocklists
  [i] Number of domains being pulled in by gravity: 149651
  [✓] Removing duplicate domains
  [i] Number of unique domains trapped in the Event Horizon: 126734
  [i] Nothing to whitelist!
  [i] Number of regex filters: 0
  [✓] Parsing domains into hosts format
  [✓] Cleaning up stray matter

  [✓] Force-reloading DNS service
  [✓] DNS service is running
  [✓] Pi-hole blocking is Enabled
  [i] Web Interface password: Z0-Agg16
  [i] This can be changed using 'pihole -a -p'

  [i] View the web interface at http://pi.hole/admin or http://192.168.0.115/admin

  [i] You may now configure your devices to use the Pi-hole as their DNS server
  [i] Pi-hole DNS (IPv4): 192.168.0.115
  [i] Pi-hole DNS (IPv6): ****:****:****:****:****:****:****:****
  [i] If you set a new IP address, please restart the server running the Pi-hole

  [i] The install log is located at: /etc/pihole/install.log
    Installation Complete!
アップデート
以下のコマンドを実行。
pihole -up
Pi-holeで設定必要なファイアウォールルール
以下参照。
Firewalls - Pi-hole documentation
設定
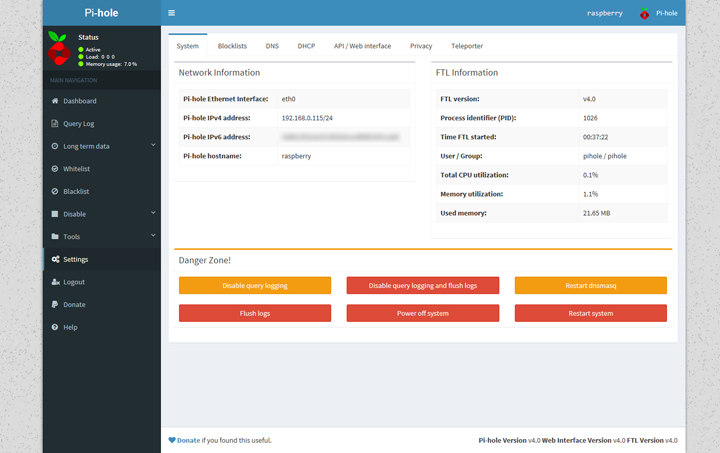
Settings - System
Pi-hole のネットワーク & システム情報を表示。ページ下部から、クエリログの消去・無効化、Pi-hole & OSの再起動等の操作可。
Settings - Blocklists
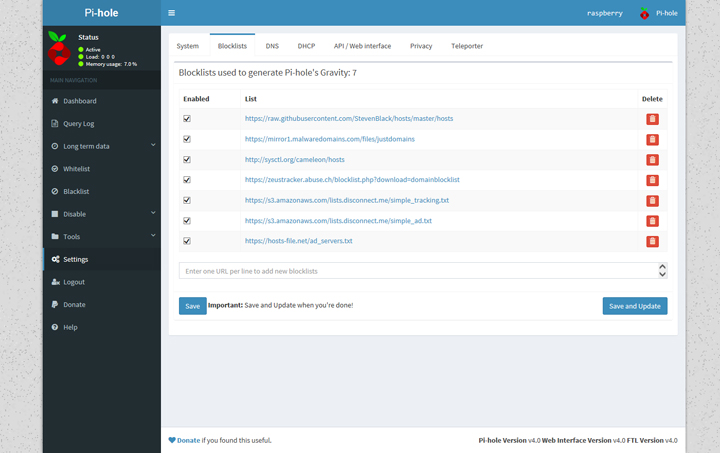
ブロックリストの表示および編集の管理画面。インストール直後に入っているブロックリストは主に海外が対象な為、日本国内 & 海外用として
- 日本国内対応
- 海外
- A detailed guide for using the MVPS HOSTS file
- Blocking with ad server and tracking server hostnames - pgl@yoyo.org
- StevenBlack/hosts - GitHub
- Using a Hosts File To Make The Internet Not Suck (as much)
- The Blocklist to filter Phishing! - Phishing Army
- The CAMELEON Project - Philippe Bourcier
- Blocklist Collection ¦ Firebog
- blocklistproject/Lists: Primary Block Lists - blocklistproject@GitHub
から
https://adaway.org/hosts.txt
https://blocklistproject.github.io/Lists/abuse.txt
https://blocklistproject.github.io/Lists/ads.txt
https://dns66.page.link/hosts
https://qiita.com/AKKYM/items/9772884e925c0647adb7
https://gist.githubusercontent.com/VirtuBox/f09968a2d27bc00ba58b3617c61dc54e/raw/56723b76a70e87a8e2344daa7637cec778a54fd7/microsoft-dns-block.txt
https://pastebin.com/raw/XF5FP2rG
https://pgl.yoyo.org/as/serverlist.php?hostformat=hosts&showintro=0&mimetype=plaintext
https://phishing.army/download/phishing_army_blocklist.txt
https://raw.githubusercontent.com/multiverse2011/adawaylist-jp/master/hosts
https://raw.githubusercontent.com/StevenBlack/hosts/master/hosts
https://s3.amazonaws.com/lists.disconnect.me/simple_ad.txt
https://s3.amazonaws.com/lists.disconnect.me/simple_tracking.txt
https://someonewhocares.org/hosts/zero/
https://someonewhocares.org/hosts/zero/hosts
https://sysctl.org/cameleon/hosts
https://v.firebog.net/hosts/AdguardDNS.txt
https://warui.intaa.net/adhosts/hosts.dos
https://warui.intaa.net/adhosts/hosts.txt
https://winhelp2002.mvps.org/hosts.txt
を追加を。重複したドメインはアップデート or ブロックリスト追加・更新時に除去されます。
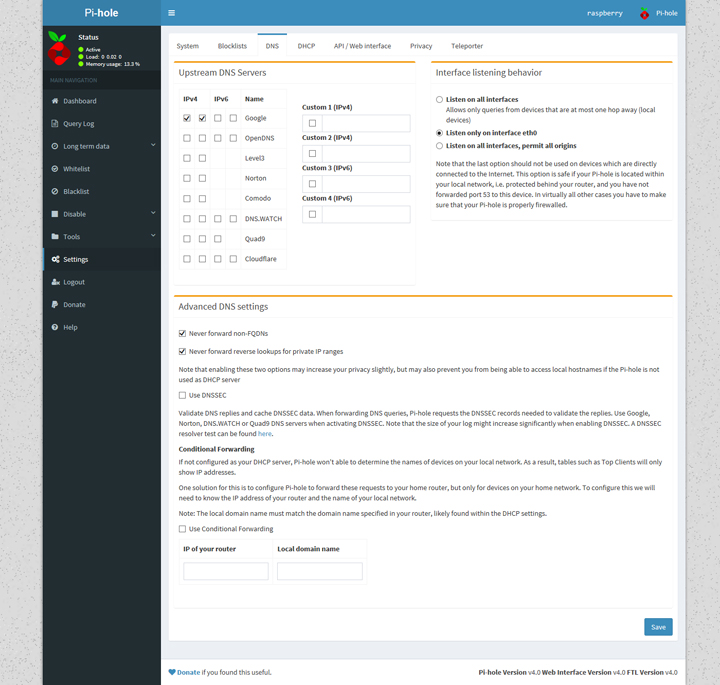
Settings - DNS
初期状態では IPv6 向け DNS サーバにチェックが付いてない為、 IPv6 接続環境の場合は確認を。
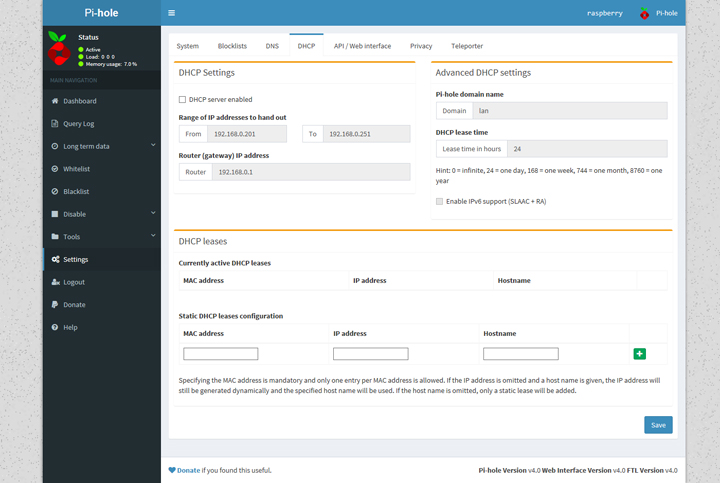
Settings - DHCP
DHCP の設定。
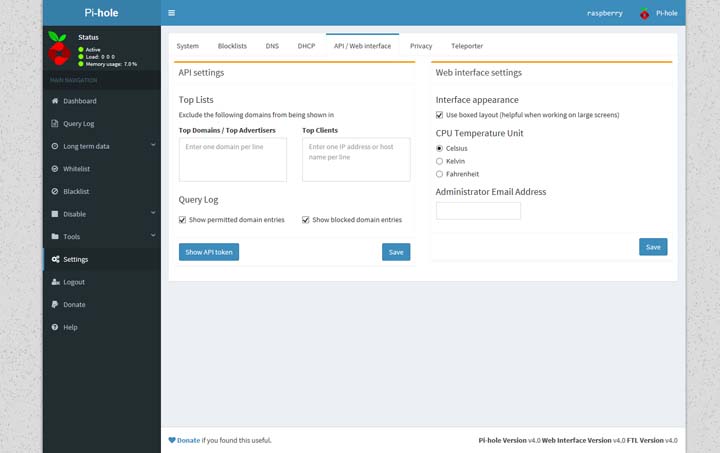
Settings - API / Web interface
API と Web インターフェイスに適用される設定(クエリ出力の例外設定・温度の単位・メールアドレス等)を管理。
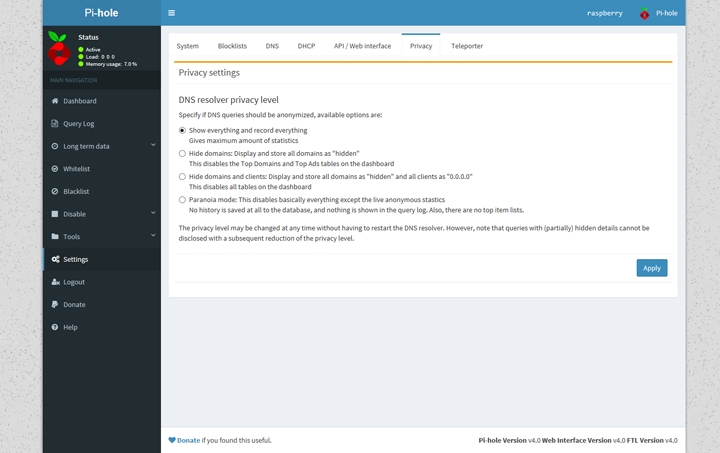
Settings - Privacy
DNS クエリ表示のプライバシーレベルを設定。詳細については Privacy levels - Pi-hole documentation を参照。
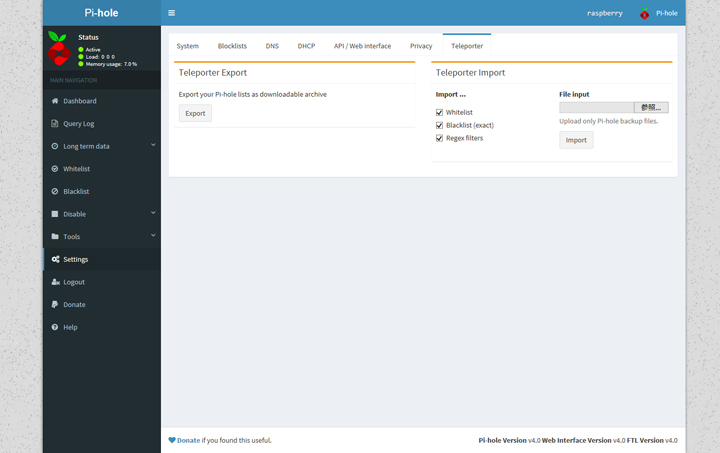
Settings - Teleporter
設定のバックアップ・リストア。
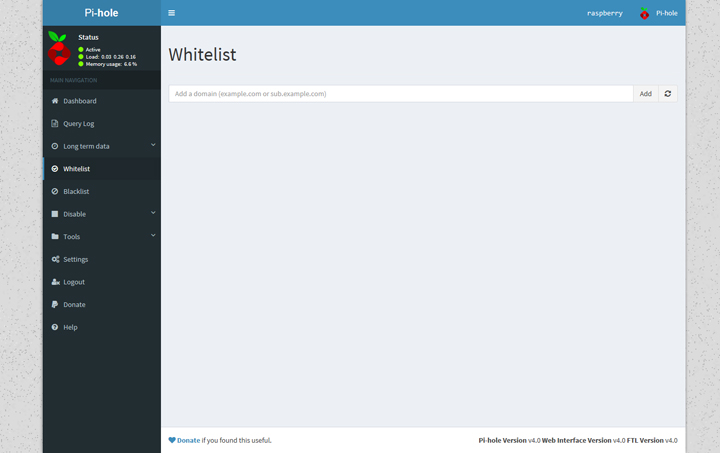
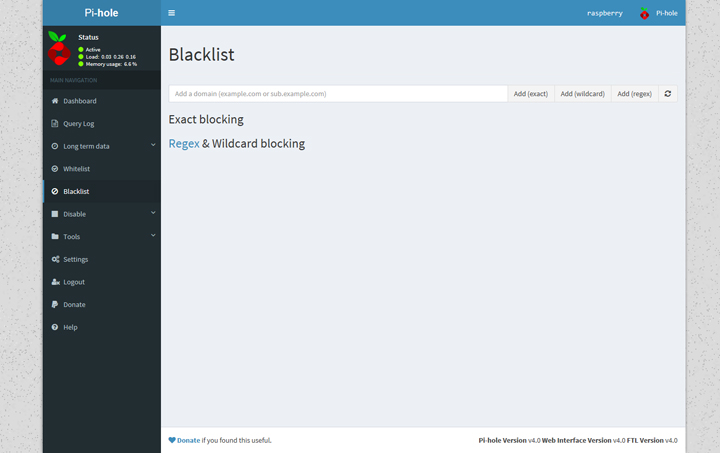
ホワイトリスト/ブラックリストの編集
Web 経由でブロックリスト追加・更新する以外にも、ブロックしたいドメインを個別にホワイトリスト/ブラックリストへ登録できます。
- ホワイトリスト
- Blocklist、もしくはブラックリスト中に含まれているが対象外としたいドメインを登録。
- 対象ドメイン(or サブドメイン)と「全て一致する文字列」を登録してください。
- ブラックリスト
- Blocklist ではブロック対象となっていないドメインを登録。
- 対象ドメイン(or サブドメイン)は「全て一致する文字列・ワイルドカード・正規表現」の三通りで登録できます。
ワイルドカードでの登録は「example.com とテキストボックスに入力 → Add (wildcard)のボタンを押す」と、 (^|.)example\com$ とドメイン・サブドメインを含めた正規表現パターンで登録されます。
動作に関する詳細は以下の通り(Pi-hole の Help から抜粋意訳)。
ホワイト/ブラックリスト
ホワイト/ブラックリストからドメイン(またはサブドメイン)を追加または削除します。ホワイトリストにドメインを追加する場合、既に登録されているドメインはブラックリストから削除され、その逆もあります。
正規表現を使用したブラックリストへの登録がサポートされています(^example と入力すると example で始まるドメインがブロックされます。詳細は Pi-hole regular expressions tutorial を参照してください。)あるドメインが正規表現のパターンに該当する場合でも、ホワイトリストに登録できます。
ドメインをスペースで区切ると、一度に複数のエントリをホワイト/ブラックリストに登録できます。
Pi-hole を DNS サーバとして使う
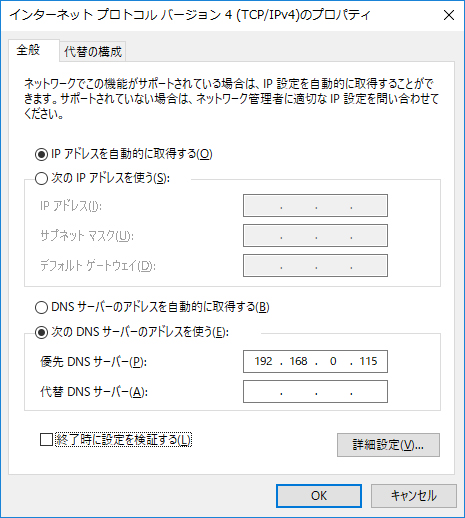
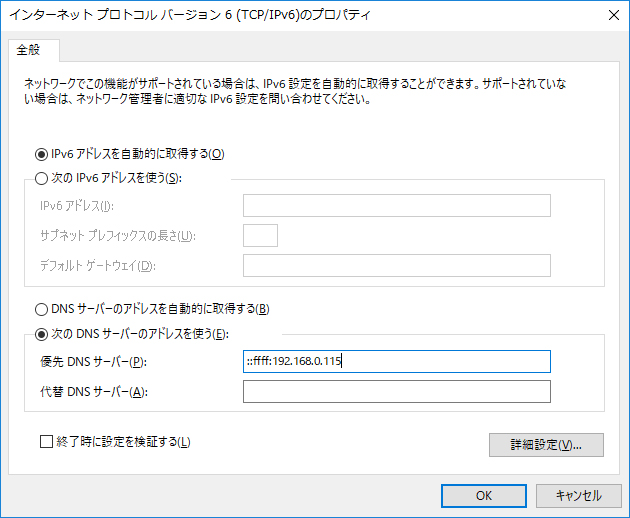
IPv4/IPv6 のDNSサーバ アドレス設定(Windows 10 での設定例)。
Client DNS Setting for IPv4
Client DNS Setting for IPv6
IPv6 向け DNS サーバの設定は IPv4 射影アドレスでも可。
Piーhole Tips
開発版を使用する
基本、リリース版の使用を推奨。バグフィックス & 最新の機能を使用したいかつ、「開発版移行時に何らかの問題が発生しても自分で対処できる」方のみ開発版に移行を。
pihole checkout dev
リリース版に戻す
sudo rm /etc/pihole/ftlbranch
pihole checkout master
Help Us Beta Test FTLDNS – Pi-hole
管理画面へのログインパスワードを再設定する
対話式で変更するなら
pi@raspberry:~ $ pihole -a -p
Enter New Password (Blank for no password):
Confirm Password:
[✓] New password set
コマンドから直接パスワード指定して変更する場合、変更したいパスワードを secretpassword とすると
pihole -a -p secretpassword
The pihole command : Password - Pi-hole documentation
Pi-holeのブロックリストを初期状態へ戻す
sudo rm /etc/pihole/list.*
pihole -g
How can I restore Pi-hole's default blocklists? - FAQs - Pi-hole Userspace
DNSブロッキング時の応答をデフォルトから変更する
デフォルトのままで問題ありません。「DNS ブロッキング時の応答を NULL 応答から変えたい」場合だけ変更を。
以下はブロッキング時の応答を NXDOMAIN で返す場合。詳細は Blocking mode - Pi-hole documentation を参照してください。
pi@raspberry:~ $ su
パスワード:
root@raspberry:/home/pi# cd /etc/pihole/
root@raspberry:/etc/pihole# echo BLOCKINGMODE=NXDOMAIN | tee -a pihole-FTL.conf
BLOCKINGMODE=NXDOMAIN
root@raspberry:/etc/pihole# pihole restartdns
Dashboard でドメインブロック数がカウントされていない
ブロッキングを無効にしていないのであれば Web インターフェイス(管理画面)の Settings - Blocklists、もしくはCUIからブロッキングリストを更新してください。
pihole -g
No blocking domain count - pihole@Reddit
クライアントからの単位時間当たりのDNSクエリ数を制限 or 解除する
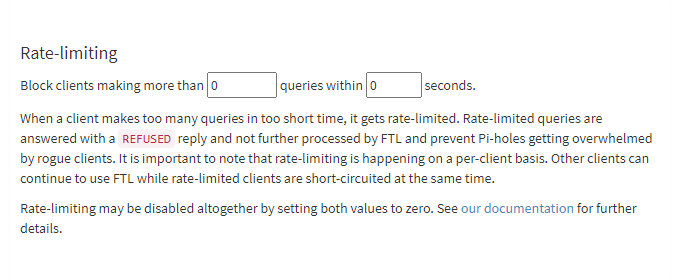
Pi-hole FTL v5.7 and Web v5.4 以降から単位時間当たりのDNクエリが制限(デフォルトで、クライアント毎に60秒間当たり1000を超えるクエリを許可しない)されるようになりました。
Hence, we decided to implement a customizable rate-limiting into FTL itself. It defaults to the rather conservative limit of allowing no more than 1000 queries in a 60 seconds window for each client. Afterwards, any further queries are replied to with empty replies with the status set to
REFUSED. Both the number of queries within the window as well as the window size can be configured by the user. It is important to note that rate-limiting is happening on a per-client basis. Other clients can continue to use FTL while rate-limited clients are short-circuited at the same time.
Pi-hole FTL v5.7 and Web v5.4 released – Pi-hole
ブラウザで30以上のページを同時に開き続けるといった動作を繰り返している場合に制限に引っかかる為、リクエスト制限によるDNSエラーが多発した場合は以下の手順で制限回避を。
# ファイルの編集
sudo nano /etc/pihole/pihole-FTL.conf
# 単位時間当たりのDNクエリが制限を解除
RATE_LIMIT=0/0
設定ファイルの編集・保存後、Web Console の Settings → System に移動し Restart DNS resolver から Pi-hole を再起動し設定変更を反映させる。ターミナルソフトからから再起動する場合は以下の通り。
# Restart DNS resolver
pihole r毛毛startdns
DNSクエリ数を制限 or 解除を GUI から変更
Pi-hole FTL v5.22, Web v5.19 and Core v5.16.1 以降、 GUI の System > DNS から「単位時間当たりのDNクエリが制限」が変更できるようになりました。
Pi-hole をフルサービスリゾルバ(キャッシュ DNS サーバ)として使う
Pi-hole をフルサービスリゾルバ(キャッシュ DNS サーバ)として使う手順を解説。
- 参考記事
Install : Unbound
Pi-hole をインストールしたマシンに Unbound をインストール。
sudo apt install -y unbound
DNSルートゾーンファイルの取得。
wget -O root.hints https://www.internic.net/domain/named.root
sudo mv root.hints /var/lib/unbound/
Setting : Unbound
before setting for Unbound
sudo mkdir -p /var/log/unbound
sudo touch /var/log/unbound/unbound.log

sudo chmod 666 /var/log/unbound/unbound.log
sudo nano /etc/apparmor.d/local/usr.sbin.unbound
# add
/var/log/unbound/unbound.log rw,
sudo apparmor_parser -r /etc/apparmor.d/usr.sbin.unbound
参考:unbound でログの書き出しに失敗する – blog@ daichang.me
sudo nano /etc/logrotate.d/unbound
/var/log/unbound/unbound.log {
    daily
    rotate 14

    ifempty
    missingok

    dateext
    dateformat _%Y-%m-%d

    create 0664 unbound unbound
}
sudo nano /etc/sysctl.conf
# ----------------------------------------------------------------------------------------------
# Setting for Unbound(so-rcvbuf: 8m & so-sndbuf: 8m)

# 受信バッファの最大値 8M > 8,388,608
net.core.rmem_max = 8388608

# 送信バッファの最大値 8M > 8,388,608
net.core.wmem_max = 8388608
# ----------------------------------------------------------------------------------------------
# 設定の読み込み
sudo sysctl -p
Setting
touch pi-hole.confor デスクトップ上で「右クリック→新規作成→空のファイル」から pi-hole.conf を作成- 作成したファイルに Pi-hole as All-Around DNS Solution - Pi-hole documentation をコピペ。
- /etc/unbound/unbound.conf.d/ 配下に作成したファイルを移動。
作成したファイルを移動させる際のコマンドは以下の通り。
# 設定用ファイルの作成
touch pi-hole.conf

# ファイルの編集
sudo nano pi-hole.conf

# ファイル編集後、所定の位置へ移動
sudo mv pi-hole.conf /etc/unbound/unbound.conf.d/
中の人用、再インストール時の設定ファイルメモ(IPv4/IPV6両対応、負荷対応やや高め)。
# /etc/unbound/unbound.conf.d/pi-hole.conf

server:
    # ログの保存場所 & エラーレベル(0~5)の設定
    logfile: "/var/log/unbound/unbound.log"
    verbosity: 0

    port: 5353
    do-ip4: yes
    do-udp: yes
    do-tcp: yes

    # May be set to yes if you have IPv6 connectivity
    #do-ip6: no
    do-ip6: yes

    # Use this only when you downloaded the list of primary root servers!
    root-hints: "/var/lib/unbound/root.hints"

    # Trust glue only if it is within the servers authority
    harden-glue: yes

    # Require DNSSEC data for trust-anchored zones, if such data is absent, the zone becomes BOGUS
    harden-dnssec-stripped: yes

    # Add@2018/11/04
    # DNSSECの署名の検証時に参照パスの検証を行う
    # NSEC/NSEC3 Replacement Attack
    # http://www.e-ontap.com/blog/20181031.html
    harden-referral-path: yes

    # Don't use Capitalization randomization as it known to cause DNSSEC issues sometimes
    # see https://discourse.pi-hole.net/t/unbound-stubby-or-dnscrypt-proxy/9378 for further details
    use-caps-for-id: no

    # Reduce EDNS reassembly buffer size.
    # Suggested by the unbound man page to reduce fragmentation reassembly problems
    edns-buffer-size: 1472

    # TTL bounds for cache
    cache-min-ttl: 3600
    cache-max-ttl: 86400

    # Perform prefetching of close to expired message cache entries
    # This only applies to domains that have been frequently queried
    prefetch: yes

    # 処理速度優先ならばCPUのコア数の値を推奨
    # One thread should be sufficient, can be increased on beefy machines
    #num-threads: 1
    num-threads: 2

    # Ensure kernel buffer is large enough to not loose messages in traffic spikes
    #so-rcvbuf: 1m
    so-rcvbuf: 8m
    #so-sndbuf: 1m
    so-sndbuf: 8m

    # Ensure privacy of local IP ranges
    # local address : IPv4
    private-address: 169.254.0.0/16
    private-address: 10.0.0.0/8
    private-address: 172.16.0.0/12
    private-address: 192.168.0.0/16

    # local address : IPv6
    private-address: fe80::/8
    private-address: fe80::/10

    # Unboud がリクエストを受け付けるのは同じマシン上の Pi-hole からだけなので access-control の設定は省略
    # デフォルトでは localhost のみ許可(allow)、残りのアクセスは拒否(refuse)される
unbound-checkconf で設定に誤りが無いのを確認。
sudo unbound-checkconf
設定に誤りが無ければ以下のような出力が。
unbound-checkconf: no errors in /etc/unbound/unbound.conf
設定ファイルを編集・確認後、Unbound をサービスとして起動。その後、適当なドメインを dig でローカルホストのポート5353へ向けて問い合わせ、応答が返ってきたなら正常に動作。
sudo systemctl start unbound
dig pi-hole.net @127.0.0.1 -p 5353
DNSSEC の動作検証は
dig sigfail.verteiltesysteme.net @127.0.0.1 -p 5353
dig sigok.verteiltesysteme.net @127.0.0.1 -p 5353
最初のコマンドの応答が SERVFAIL、2番目のコマンドで NOERROR が返ってくるなら正常に動作。
Setting : Pi-hole
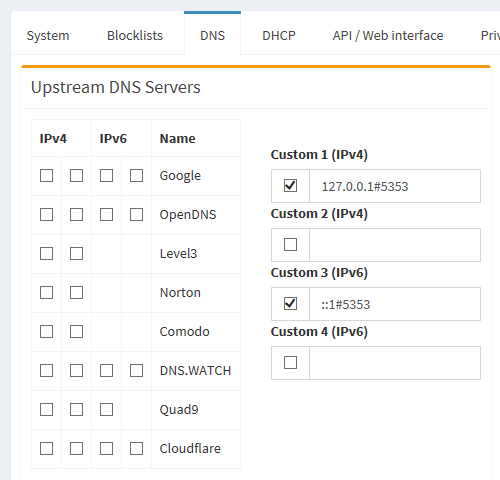
Unbound 側の動作確認後、Piーhole : Settings - DNS の「Upstream DNS Servers」で現在使用しているパブリック DNS 側のチェックを外し、
- Custom 1(IPv4) >> 127.0.0.1#5353
- Custom 3(IPv6) >> ::1#5353
を入力。該当項目にチェックを入れた後に設定を保存。DNSSEC 使用時はそちらにもチェックを。
Unbound をローカル用 DNS サーバとして使用する
Notice
Pi-hole Ver 5.x から Pi-hole 側でローカルDNSサーバの機能が実装されました。Local DNS → DNS Records から設定可能です。
以下の作業は、Unbound をフルサービスリゾルバー(キャッシュDNSサーバー)だけでなくローカルDNSサーバとして併用したい場合のみ行ってください。
Setting : Local DNS Server
Unboud をインストールしたついでに、LAN内のサーバに対してもドメイン名でアクセスできるようにしてみる。
「アクセスしたいローカルドメインとIPの対応」を /etc/unbound/unbound.conf.d/pi-hole.conf に追記、もしくは任意ファイル名(例:localdomain.conf)で作成し /etc/unbound/unbound.conf.d/ 配下に置く。
以下は、家庭内LANでの設定例。
server:
    # ローカルにあるサーバをドメイン名でアクセス
    local-data: "esxi.localdomain.    IN A 192.168.0.101"
    local-data: "nas.localdomain.     IN A 192.168.0.103"
    local-data: "rec.localdomain.     IN A 192.168.0.105"
    local-data: "node-js.localdomain. IN A 192.168.0.107"

    # 外部公開しているWebサーバをドメイン名でアクセス(ヘアピンNAT非対応ルータの場合)
    local-data: "example.net.   IN A 192.168.0.110"
    local-data: "example.com.   IN A 192.168.0.110"
    local-data: "example.org.   IN A 192.168.0.110"
作成後、設定をリロードし
sudo unbound-control reload
Unboud が動いているマシンから nslookup もしくは dig で応答を確認する。
dig esxi.localdomain @127.0.0.1 -p 5353
dig nas.localdomain @127.0.0.1 -p 5353
dig rec.localdomain @127.0.0.1 -p 5353
dig node-js.localdomain @127.0.0.1 -p 5353
dig example.net @127.0.0.1 -p 5353
dig example.com @127.0.0.1 -p 5353
dig example.org @127.0.0.1 -p 5353
参考記事
Pi-hole Official
- Pi-hole
- Pi-hole - GitHub
- Document
Pi-hole Installation & Trial Report
- Complete Pi Hole Tutorial - Network-wide whole home Ad blocker
- Overview : Pi Hole Ad Blocker with Pi Zero W - Adafruit Learning System
- Simple guide to setting up a Pi Zero W and installing Pi-Hole : pihole
- DNSキャッシュサーバなアドブロッカーのPi-holeを試す – matoken's meme
- UbuntuServer18.10 PiHoleで悪質サイト・広告をブロッキング - 鳥さんでは足りないつぶやき
Blocking List
- 広告除去用ホストファイル - 悪いインターネット
- 280blocker
- ログろいど
- hosts2ch
- A detailed guide for using the MVPS HOSTS file
- Blocking with ad server and tracking server hostnames - pgl@yoyo.org
- The Blocklist to filter Phishing! - Phishing Army
Unbound
- Unbound - NLnet Labs
- unbound.conf(5) – 日本Unboundユーザー会
- unbound-control(8) – 日本Unboundユーザー会
- Unboundを使ってお手軽内向きDNSサーバーを構築する - web net FORCE
DNS
- DNS Tips:DNSの問い合わせと応答について教えてください - @IT
- DNS sinkhole - Wikipedia
- Security
- Benchmark
- DNS Blocking
Tool
- ドメインソート
- DNS Jumper - k本的に無料ソフト・フリーソフト
- 【レビュー】リストから選ぶだけ。お手軽なDNS設定の変更ツール「Public DNS Server Tool」 - 窓の杜
- IP(v4)アドレスを切り替えるバッチファイルです - palm84.com
- Windowsにdigコマンドをインストールする方法 - OXY NOTES
- DNS Queryのリアルタイム統計をサーバ内で表示(dnstop編) - rotekxyz@Quiita
- Pi-holeのAdリストを手軽に充実 & ブロックリストの効果確認 - RemoteRoom
- ブラウザ拡張機能